Learning how to make a shortcode in WordPress may be a quick method to change your articles and pages. However, if you’re new to the process, you may have difficulty understanding how to implement such a function on your website.
That’s why we created a guide to help you get started. By learning how shortcodes operate and how to use them effectively, you can start changing your content without the need for extra plugins.
In this piece, we’ll explain what WordPress shortcodes are and why you would want to use them. We will then teach you how to make your own. Let’s get started.
What are WordPress Shortcodes?
WordPress shortcodes serve as shortcuts, allowing you to easily embed components into a post or page. A shortcode is often a single line of code enclosed in square brackets, like this: [exampleshortcode]. This code will add a preset feature to the front end of your website.
WordPress originally offered shortcodes with the introduction of the Shortcode API. This allows users to quickly include interesting components in their posts and pages, such as Google Maps or the Facebook “Like” button.
WordPress has six default shortcodes
- Captions are wrapped around the material, whereas galleries display images.
- audio: embed and play audio files.
- video: embed and play video files.
- playlist: presents a collection of audio or video files
- embed: Wraps embedded elements.
You will also encounter two main forms of shortcode formatting: self-closing and enclosing. Examples of self-closing shortcodes are gallery and video, which do not require a closing tag.
Meanwhile, enclosing shortcodes wrap around the text you wish to change and force you to close the tag manually. To embed a YouTube video, encapsulate the URL with the embed and /or embed tags.
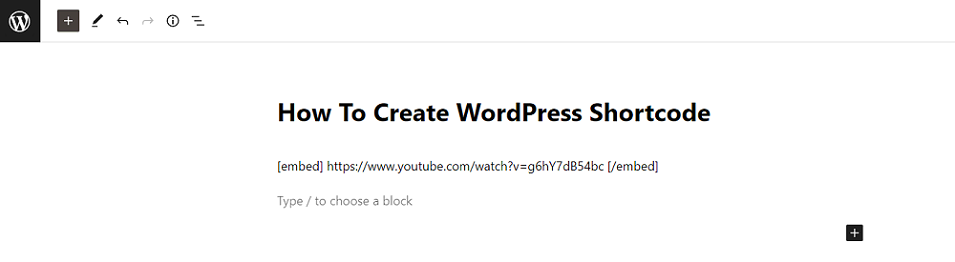
For example, this would get the following results:
Some of the top WordPress plugins provide their shortcodes. For example, WP Forms and Contact Form 7 provide shortcodes that allow you to rapidly embed a WordPress contact form into a post or page. You may also use a plugin like MaxButtons to put a WordPress button shortcode anywhere on your website.

Some of the top WordPress plugins have their shortcodes. For example, WP Forms and Contact Form 7 both have shortcodes that allow you to rapidly embed a WordPress contact form into a post or page. You may also use a plugin like MaxButtons to insert a WordPress button shortcode anywhere on your website.
Why should you consider using WordPress shortcodes?
There are several reasons you may want to use WordPress shortcodes. For example, it is simpler and faster than learning and writing a large piece of HTML code. They also assist you keep your material clean and accessible.
Shortcodes can be used to automate functionality that you use frequently. For example, if you employ a call to action (CTA) button in each of your posts, having a dedicated shortcode available might be a quick and convenient option.
It is worth noting that the Gutenberg Editor functions similarly, relying on the usage of shortcodes. It allows WordPress users to build various interactive elements using blocks.
Such an approach is significantly more user-friendly since you can add material straight to the user interface. However, the WordPress Block Editor is still restricted in its features. Luckily, it has a Shortcode block, which allows you to add unique information to your sites.
How to Create a Shortcode in WordPress (7 Steps)
If you have any coding experience, you might wish to design your own unique shortcodes. This allows you total control over the design and functioning of your website.
Let’s see how to make a custom WordPress shortcode. In this lesson, we will use a post to demonstrate how to add social media connections.
Step 1: Create a New Theme File
Before you begin, make a thorough backup of your WordPress site. You’ll also need to make a separate file for your custom shortcode outside of your theme’s functions.php file. This will give a backup plan in case something goes wrong.
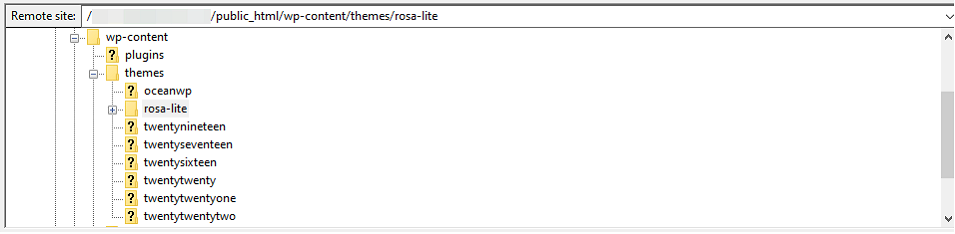
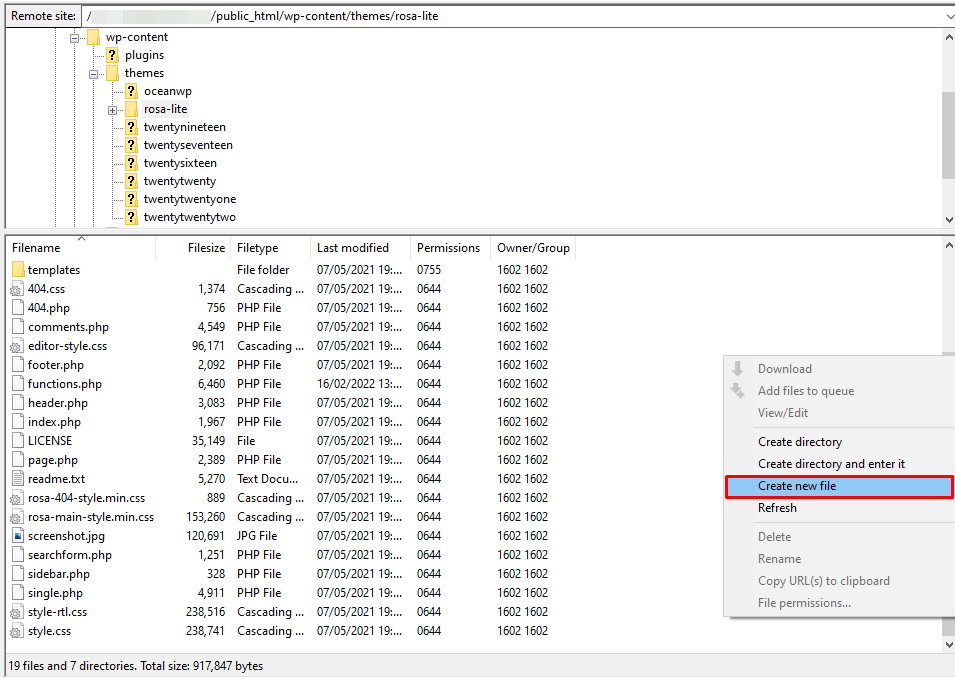
To access your site’s theme files, use an FTP software like FileZilla. Once linked to your site, go to wp-content > themes and find the folder containing your current theme. In our case, this will be rosa-lite.
Open your theme’s folder, right-click, and select the Create new file button.
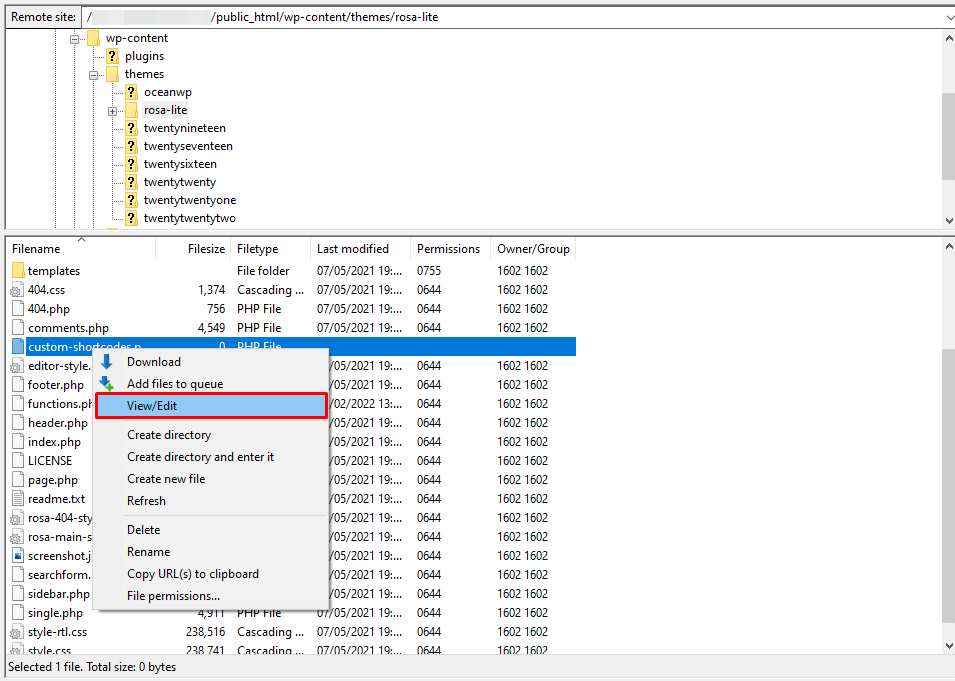
Name your new file custom-shortcodes.php and click OK. You can then edit it by right-clicking it and choosing View/Edit.
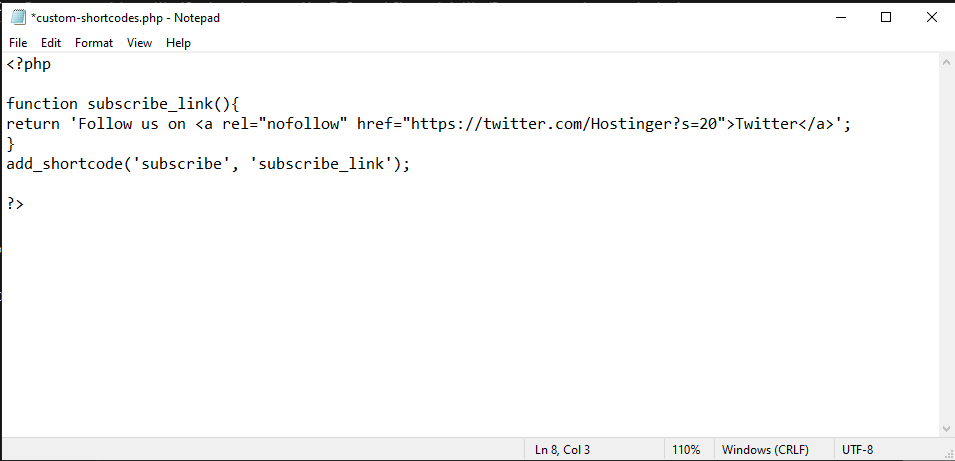
This will open the file using your default text editor. Then, simply add the following block of code.
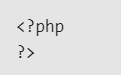
This guarantees that your new file is interpreted as PHP, the programming language that WordPress is based on.
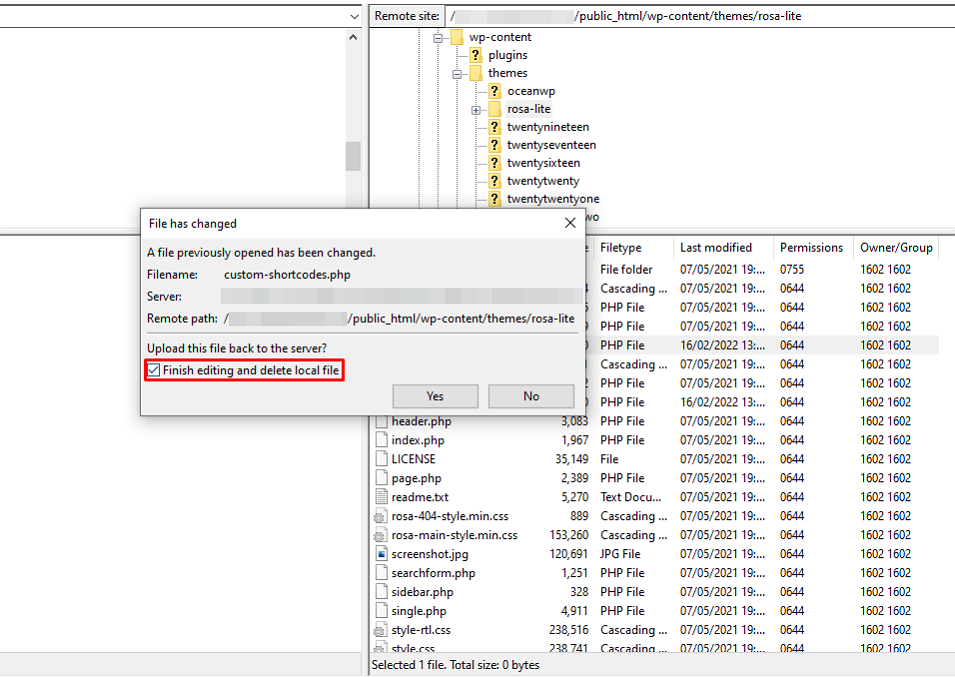
You may then save and close the file. Check the box here to verify that it is updated on the server and applied to your website.
Next, open the functions.php file in the same theme folder and insert the following code at the bottom of the document:

Next, open the functions.php file in the same theme folder and insert the following code at the bottom of the document:
Step 2: Create the Shortcode Function
Next, you’ll need to define the shortcode’s function and tell it what to perform. Choose View/Edit again for your custom-shortcodes.php file. To attach your function to an action, use the code snippet below:

The next step is to add a callback function that will be executed when the hook action is invoked. Adding the following line of code immediately after the one described before will notify WordPress that your function is a shortcode:

When you use the add_shortcode function to create a shortcode, you specify a shortcode tag “($tag)” and a function hook “($func)” that will be executed whenever the shortcut is utilized.
If the shortcode tag is [subscribe], the hook’subscribe_link’ will lead visitors to the supplied URL.
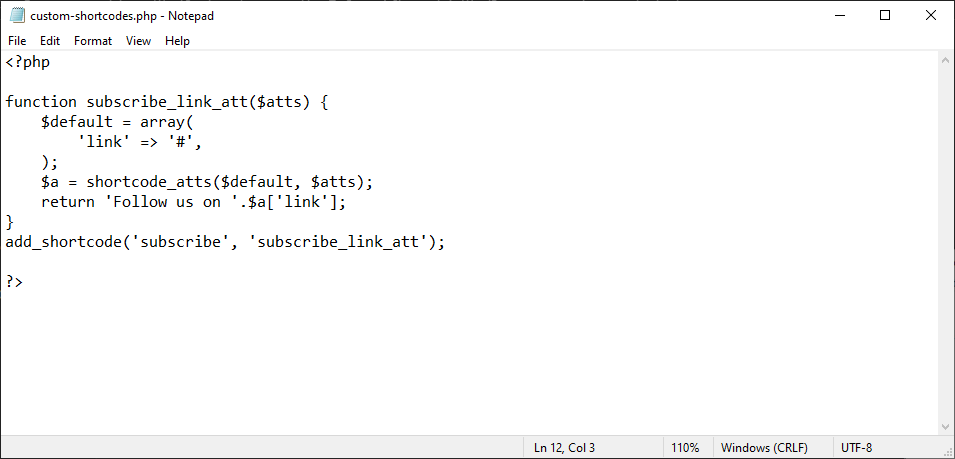
As a result, the complete code you’ll use in your custom-shortcodes.php file will appear like this:
It should be noted that while naming tags, you should only use lowercase characters, but underscores are allowed. It’s also important to avoid using hyphens because they might interfere with other shortcodes.
Step 3: Add the Self-Closing Shortcode to the Website
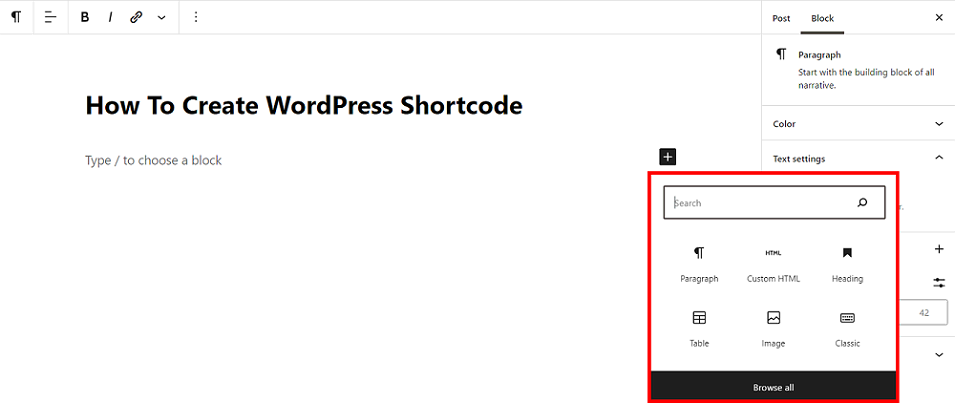
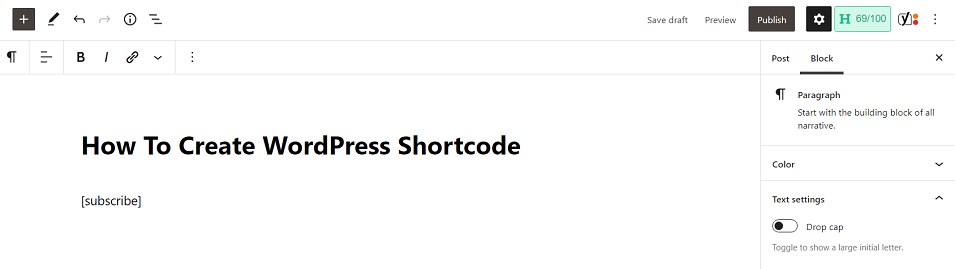
You may now run your initial code as a self-closing shortcode on your WordPress website. To add the [subscribe] tag to a WordPress article, use the Block Editor.
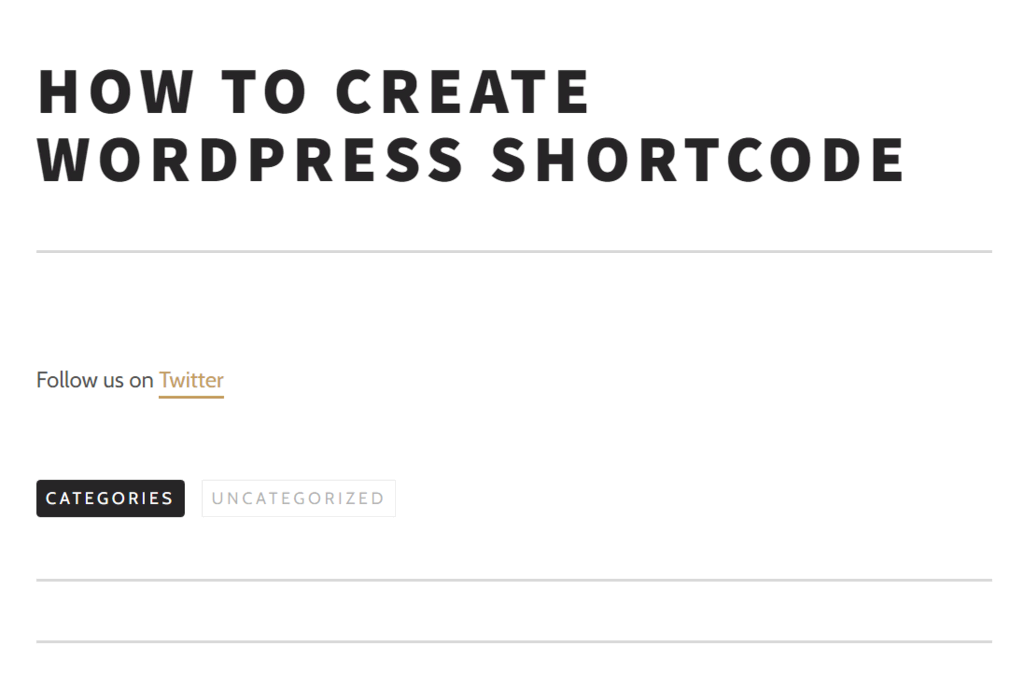
This will display the following content for your website visitors:
If you are satisfied with this shortcode, you do not need to do anything further. However, if you want to change it, proceed to the following step.
Step 4: Add Parameters to the Shortcode.
You may customize the’subscribe’ shortcode to display extra social media links. You may accomplish this by adding a parameter that changes the URL.
To add handling characteristics, open the custom-shortcodes.php file and enter the following code:
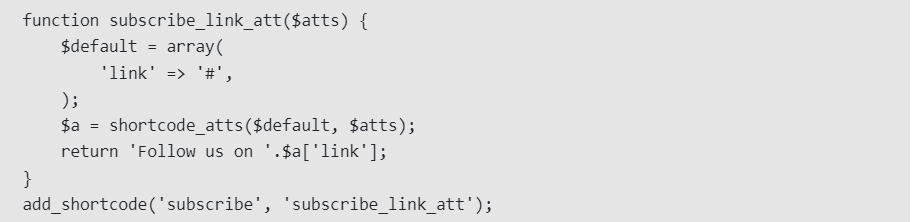
This allows you to alter the links within your shortcode tag and add them to the Gutenberg Editor. You may paste it over the existing code in the custom-shortcodes.php file. It should look somewhat like this.
The shortcode_atts() method will combine user attributes with any known attributes, and any missing data will be set to the default values. When you’re finished, save your changes and exit the file.
Step 5: Test the Parameters
You can now try the new shortcode in the WordPress Block Editor. In our example, we’re checking our Twitter and Facebook connections using the following shortcodes:

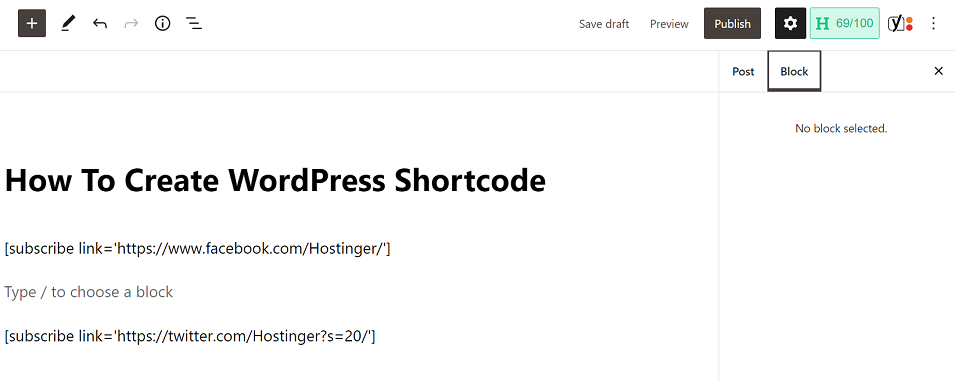
This will generate the following result on the front end:
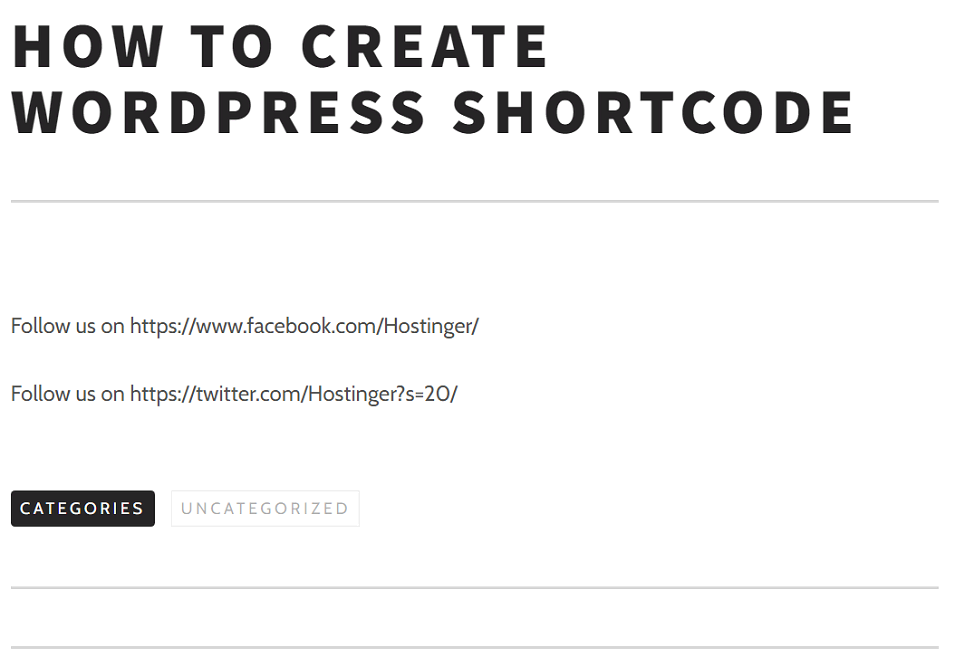
This self-closing shortcode exposes direct URLs to your social profiles to visitors. However, you may want this feature to seem more finished.
For example, you may develop an enclosed version that allows you to completely change the anchor text displayed to visitors when they are going to click it. We’ll teach you how to accomplish it in the next step.
Step 6: Create an Enclosing Shortcode
The enclosing shortcode will be formatted identically to the previous self-closing example. However, it will add one more argument to the function.
First, add $content = null to identify this function as an enclosed shortcode. You may then include the WordPress do_shortcode function, which searches the content for shortcodes.
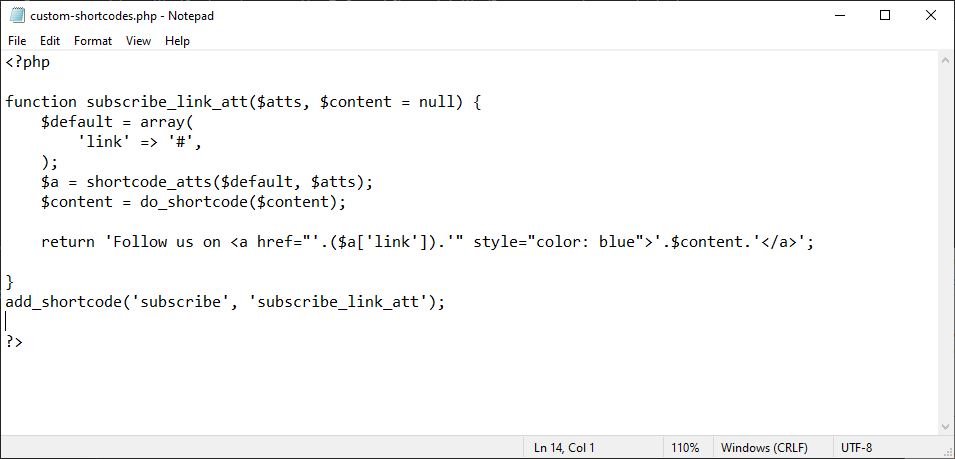
In the custom-shortcodes.php file, include the following new shortcode:
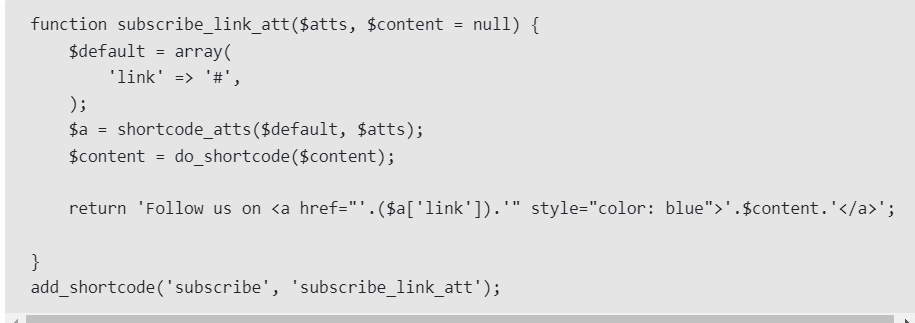
When you’re finished, your custom-shortcode.php file should seem like this:
Step 7: Add an Enclosing Shortcode to the Website
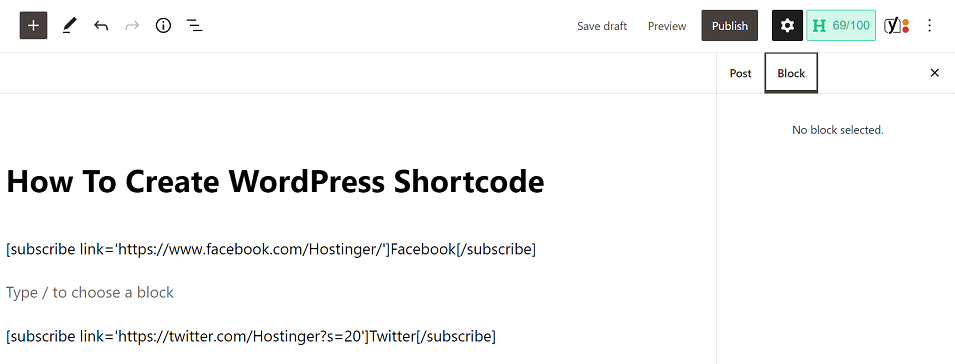
As you can see, the enclosed shortcode allows you to simply adjust the URLs of your social network pages as well as the anchor text displayed to visitors. In this scenario, we choose “Facebook” and “Twitter”:
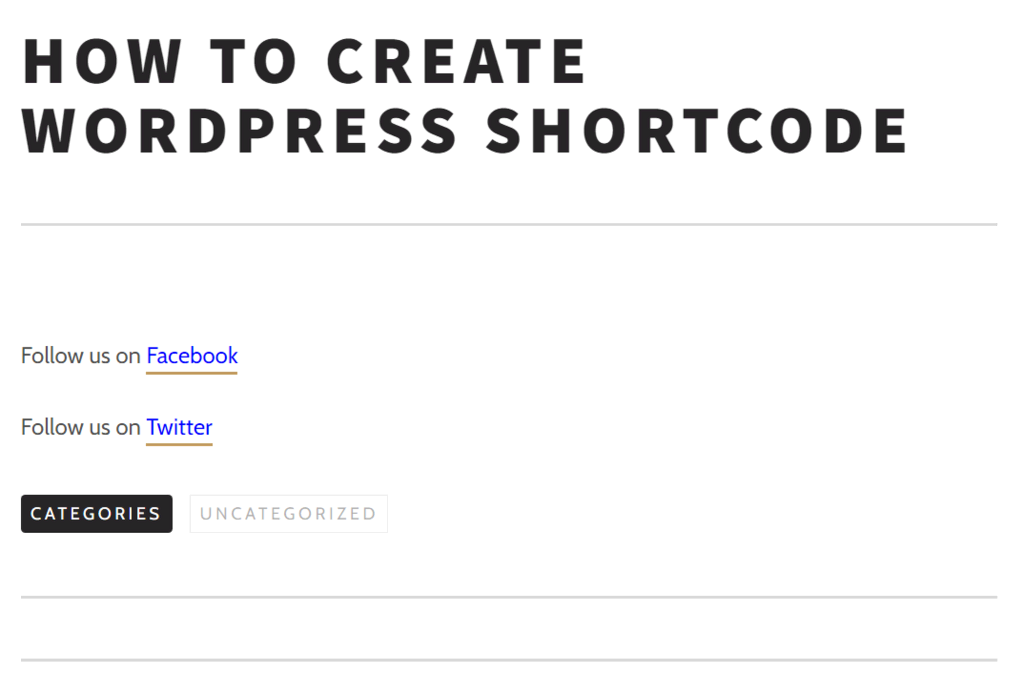
That is it! You’ve now generated a custom shortcode for subscription links on your pages and articles. Take notice that any of the above stages may be modified to create a variety of various parts utilizing the WordPress Shortcodes feature.
Conclusion
Adding more functionality to your WordPress website is much easier using shortcodes. You may use them to personalize your current content and incorporate interactive elements like contact forms, image galleries, and subscription links.
In this tutorial, we learnt how to develop your own shortcode in WordPress in seven simple steps.
- Create a new theme file
- Create a shortcode function
- Add the self-closing shortcode to your website.
- Add arguments to the shortcode
- Test the settings.
- Generate an enclosing shortcode
- Add the included shortcode to the webpage
Best Website Design Services
Our highly rated web designers create websites that are compatible with all browsers and devices, using a simple user interface. Contact the LadiTech Web Design team.
+1 (613) 416 7874
+1 (386) 400 5005
+90 (212) 900 9094