Would you like to include a navigation menu on your WordPress site?
WordPress has a drag-and-drop menu interface that you can use to construct header menus, drop-down menus, and more.
This step-by-step tutorial will show you how to effortlessly create a navigation menu for your WordPress site.
What exactly is a Navigation Menu?
A navigation menu is a list of connections to key elements of a website. On a WordPress website, they are often shown as a horizontal bar of links at the top of each page.
Navigation menus assist users locate what they’re looking for by giving your site structure. On WPBeginner, the navigation menu looks like this:
WordPress makes adding menus and sub-menus a breeze. Links to your most significant pages, categories, or subjects, WordPress blog articles, and even custom links like your social media profile can be included.
The precise location of your menu will be determined by your WordPress theme. Most themes will include multiple choices for creating different menus that can be shown in various locations.
For example, most WordPress themes include a primary menu that appears at the top. A secondary menu, a footer menu, or a mobile navigation menu may also be included in some themes.
So, let’s look at how to make a custom navigation menu in WordPress.
How to Make Your First Custom Navigation Menu
You must go to the Appearance » Menus tab in your WordPress admin panel to create a navigation menu.
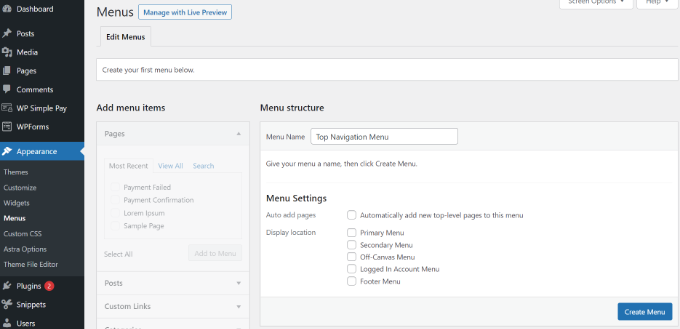
First, give your menu a name, such as ‘Top Navigation Menu,’ and then click the ‘Create Menu’ button.
This will enlarge the menu area and make it appear like this:
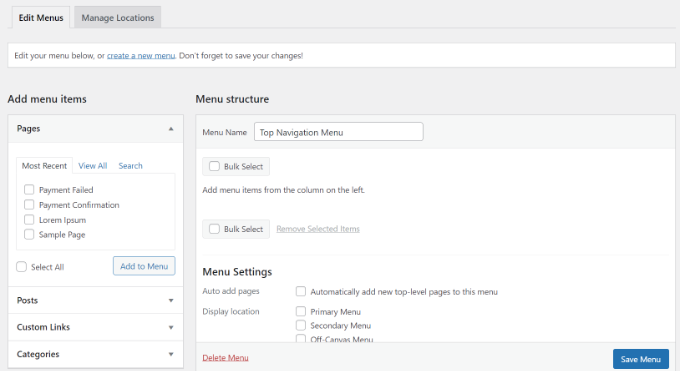
Following that, you can select whatever pages you want to include in the menu. You can either add all new top-level pages automatically or pick individual pages from the left column.
To begin, select the ‘View All’ tab to see all of your site’s pages. Then, check the box next to each of the pages you wish to include in your menu and press the ‘Add to Menu’ button.

After you’ve added your pages, you can move them about by dragging and dropping them.
You can change their order and reorganize them this way.
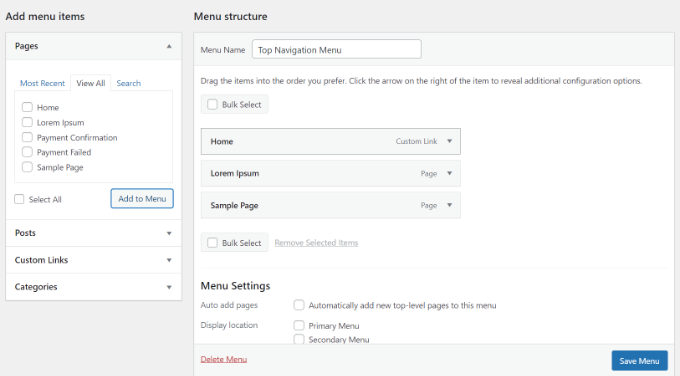
In the menu editor, all menu items are listed vertically (from top to bottom). Depending on the location you choose, the menu will appear vertically or horizontally (left to right) on your site.
Most themes allow you to place menus in a variety of places. We’re utilizing the Astra theme in this example, which includes five different locations.
After adding pages to the menu, choose where you want the menu to appear and click the ‘Save Menu’ button.
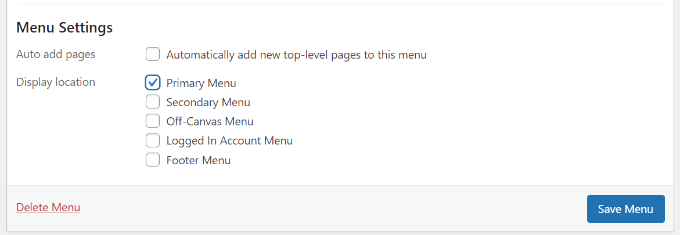
If you’re not sure where each location is, save the menu in different locations and then visit your site to check how it looks. You’re unlikely to use all of the locations, but you could want to use more than one.
On the website, here is our completed menu:
Final WordPress Navigation Menu

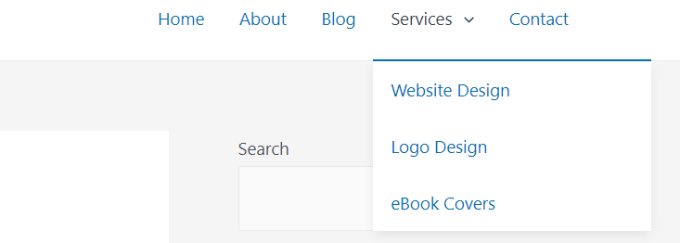
Drop-Down Menus in WordPress Drop-down menus, also known as nested menus, are navigation menus that contain parent and child menu items. When you hover your mouse over a parent item, all of the child items appear in a sub-menu beneath it.
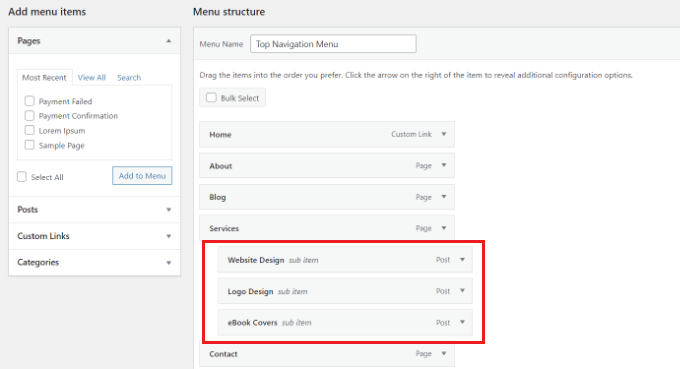
Drag an item below the parent item and then slightly to the right to create a submenu. In our menu, we’ve done this with three sub-items beneath ‘Services’:
You can even add numerous levels of dropdowns to your sub-menu so that it has its own sub-menu. This can result in a cluttered appearance, and many themes do not allow multi-layer drop-down menus.
Here’s the live sub-menu on our sample site:
LadiTech Website Design Services
Our highly recommended web designers simply create websites that are compatible with all browsers and devices by employing a basic and straightforward user interface.